

[Returns: -10%] Tron Ambience Island Extractor Hood

[Returns: -10%] Tron Ambience Island Extractor Hood
-
Note: Product is functional + has signs of wear
Details: Product may have a cosmetic damage (e.g. small scratches) on top, front or sides. The original box may be damaged or repacked. Additionally, some parts may be missing such as the user manual, network cable, remote control, filter. Product comes with a 1-year warranty395,99 € -
464,99 €
- Low stock - order quickly! In stock and ready for you! Order now and enjoy your purchase without delays. Low stock - order quickly!
- Shipping time: 4 - 6 days Receive it sooner than you think. Don’t miss this opportunity, order now! Receive it sooner than you think. Don’t miss this opportunity, order now!
- Ready to ship in 24 hours
- 14 day cooling off period
Condition - like new, with minor signs of wear
Details: Product may have a cosmetic damage on non-visible sides (back or bottom). The original box may be slightly damaged or repacked. Product comes with a 1-year warranty
Top features
The focal point: island exhaust hood for ceiling mounting above freestanding cooking zones
Powerful: maximum circulating air flow of up to 540 m³ / h
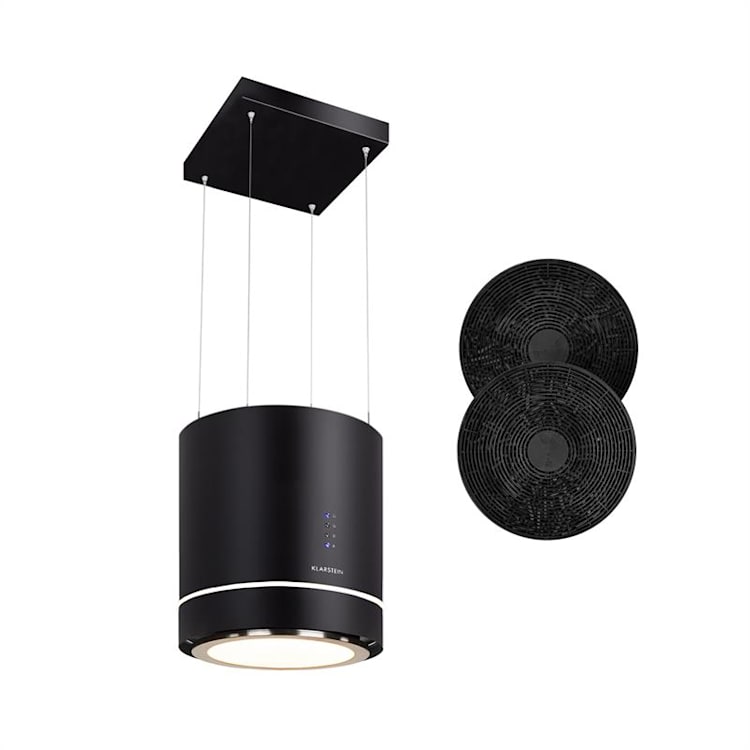
Futuristic look: PureAmbience design with round case and LED light ring
Features
- On / Off switch on front of the hood
- Three selectable circulation stages
- Built-in white hob lighting
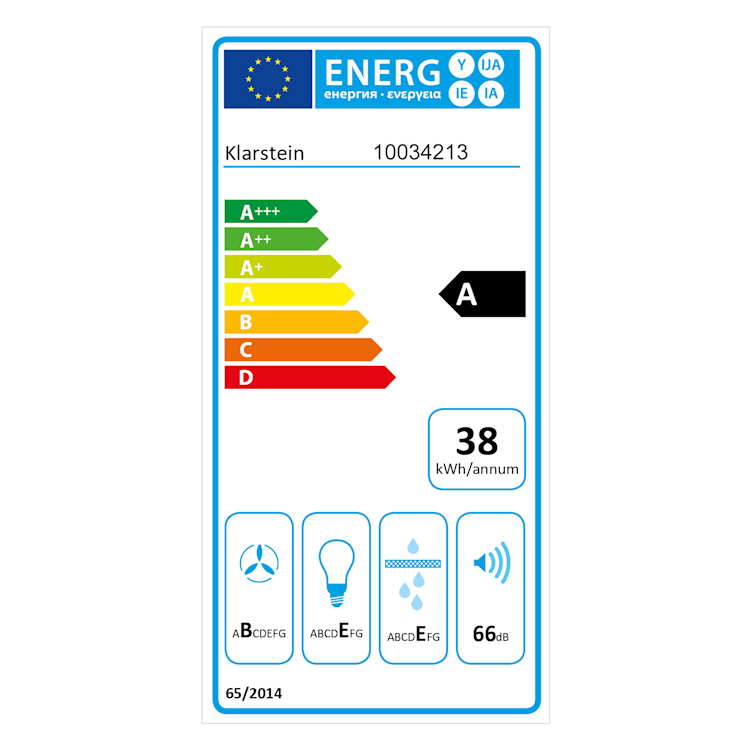
- Energy efficiency class A
- Removable, washable aluminium grease filter
- Height of suspension adjustable, max. 60 cm
- Exhaust hood in recirculation mode
- Ceiling plate with cut-out for the power cable
- Matching replacement activated carbon filters are available under article number 10030983
- Power supply: 220-240V ~ | 50 Hz
Dimensions and Technical Details
- Dimensions: approx. 38 x 45 cm (ØxH)
- Dimensions ceiling plate: approx. 28 x 4 x 28 cm (WxHxD)
- Cable length: 140 cm
- Weight: approx. 15 kg
What will be delivered?
- 1 x extractor hood
- 1 x ceiling plate
- 2 x activated carbon filters
- 1 x mounting material (screws and dowels)
- User manual in English (other languages: German, Spanish, French, Italian)
Delivery & shipment
Shipping time: 4 - 6 days
Your order will be delivered to the selected address per order. This address does not have to match the billing address. You can send the orders to your family, friends or office if you are not at home during the day.
Safety and Operating Instructions
Product Safety Information
Manufacturer:
Chal-Tec GmbH
Wallstr. 16
10179 Berlin
www.berlin-brands-group.com
Responsible Person:
Chal-Tec GmbH
Wallstr. 16
10179 Berlin
E-mail address:
info@go-bbg.com
No review available for this item.
Sehr zu empfehlen
Highly recommended
ho acquistato questo prodotto in sostituzione di un altro arrivato purtroppo con un graffio molto evidente, il venditore ha provveduto al rimborso non appena ricevuto quello che ho provveduto a restitutire. l'attuale cappa e molto bella ed è arrivata con notevole anticipo rispetto alla data di consegna prevista. buona aspirazione e facile il montaggio. la consiglio bella l'estetica
I purchased this product to replace another one that unfortunately arrived with a very obvious scratch, the seller refunded me as soon as I received the one I returned. The current hood is very nice and arrived well ahead of the expected delivery date. Good suction and easy assembly. I recommend it, nice aesthetics
Facile à installer et utiliser avec un beau style Bruyante comme toutes hottes de ce type
Easy to install and use with a beautiful style Noisy like all hoods of this type
Schnelle Lieferung Die Haube ist etwas frickelig anzubringen, aber sieht gut aus und funktioniert perfekt.
Fast delivery The hood is a bit fiddly to attach, but looks good and works perfectly.
Tolle Abzugshaube, etwas laut, schnelle Lieferung Eigentlich wollten wir nie eine solche "Tonne" als Abzugshaube. Aber wir haben unsere Meinung geändert. Das Design ist schön. Wir hatten vorher eine andere Inselabzugshaube, die immer wieder gesäubert werden musste und die Filter hatte, die geschnitten werden mussten. Hier sind die Knöpfe eindeutig und einfach zu erreichen (jede Berührung der flächigen Edelstahlfläche bei anderen Hauben muss gereinigt werden). Der Motor ist etwas laut, aber effektiv. Auf den Bildern des Verkäufers ist das Kabel von der Deckenbefestigung zur Haube nie zu sehen. Ich hab dort ein altertümliches schwarzes Gewebekabel verwendet. Sieht viel besser aus. Aber: Wie auch andere Rezensenten geschrieben haben: Die Beschreibung und Anbauanteilung sind mehr als dürftig. Achtung: Ich habe einmal an den Stahlseilen gezogen - danach geht das nicht mehr zurück. Habe "Gott sei Dank" nicht zu weit gezogen. Die Anleitung bedarf definitiv einer Vervollständigung durch den Hersteller, Handwerker kommen allerdings damit klar. Die Ausrichtung ist einfach und sinnvoll. Die mitgelieferten Dübel sind ok, allerdings empfehle ich etwas bessere 10 mm. Alles in allem: Tolles Produkt, gut zu installieren, Anleitung verbesserungswürdig.
Great extractor hood, a bit loud, fast delivery We never actually wanted a "barrel" like this as an extractor hood. But we changed our minds. The design is nice. We previously had another island extractor hood that had to be cleaned over and over again and had filters that had to be cut. Here the buttons are clear and easy to reach (every time you touch the flat stainless steel surface on other hoods you have to clean it). The motor is a bit loud, but effective. In the seller's pictures, the cable from the ceiling mount to the hood is never visible. I used an old-fashioned black fabric cable there. Looks much better. But: As other reviewers have written: The description and installation instructions are more than poor. Warning: I pulled on the steel cables once - after that it doesn't go back. "Thank God" I didn't pull too far. The instructions definitely need to be completed by the manufacturer, but tradesmen can manage it. The alignment is simple and makes sense. The supplied dowels are OK, but I recommend slightly better 10 mm ones. All in all: great product, easy to install, instructions could be improved.
Produit conforme à sa description, design, et performant
Product conforms to its description, design, and performance
Bon produit, la hotte est simple à installer (mm si il faut être bon bricoleur et surtout à 2) Comme de nombreuses hotte suspendu, elle n’est pas hyper silencieuse. La lumière est un peu jaune et peu puissante (idéal pour ne pas être éblouis mais moins pour faire à manger…) Dans l’ensemble je la trouve pratique, esthétique et abordable financièrement. Attention elle n’est pas connecté (je le pensais mais j’ai eu le mélanger les pinceaux en comparant les modèles)
Good product, the hood is easy to install (even if you have to be a good handyman and especially with 2 people) Like many suspended hoods, it is not super quiet. The light is a little yellow and not very powerful (ideal for not being dazzled but less so for cooking...) Overall I find it practical, aesthetic and affordable financially. Be careful it is not connected (I thought so but I got mixed up comparing the models)
La campana es muy bonita y funciona bien, aunque el cable eléctrico negro es un pegote, nosotros lo pintamos en blanco y queda mucho mejor. También hay que destacar que la campana llegó con roces y golpes en la parte superior. Los agujeros para tornillos de la placa que va al techo con el embellecedor no coinciden y tuvimos que hacer algún apaño para que se pudiesen encajar.
The hood is very nice and works well, although the black electrical cable is a mess, we painted it white and it looks much better. It should also be noted that the hood arrived with scratches and bumps on the top. The screw holes on the plate that goes to the ceiling with the trim do not match and we had to do some work to make them fit.
Economica e d'effetto. Non è rumorosa come descrivono neanche alla massima potenza. Illuminazione giusta del piano con una luce gradevole. Per il momento siamo soffisfatti.
Economical and effective. It is not as noisy as they describe even at maximum power. The right illumination of the surface with a pleasant light. For the moment we are satisfied.
Bellissima top
Beautiful top
Gerät lauter als erwartet
Device louder than expected
Geräuschpegel Gerät lauter als erwartet
Noise level device louder than expected
Point négatif, le bruit.
Negative point, the noise.
Leider ist der Beleuchtungsring nach mehreren Monaten schon gerissen. Das ist ein erheblicher Mangel und somit wird das ansonsten lukrative Produkt leider etwas minderwertig. Der Ventilator könnte etwas leiser sein. Bezüglich der Ringlampe und einer Erneuerung könnten Sie da vielleicht etwas anleiern. Wäre schön. Danke Der Herstellungsfirma Bitte Kenntnis geben.
Unfortunately, the lighting ring broke after several months. This is a significant shortcoming and unfortunately makes the otherwise lucrative product a bit inferior. The fan could be a little quieter. Regarding the ring lamp and a renewal, you could maybe do something about it. Would be nice. Thanks The manufacturing company Please let me know.
Desing futuristico e funzionalità eccellente
Futuristic design and excellent functionality
Le produit multimédia n'a pas pu être chargé. Esthétique noir qui correspond au style de la cuisine. Des éléments de fixation du câble d'alimentation sur le câble inox pourrait être fournis (solution des colliers rilsants moyen) pour améliorer l'esthétique.
The multimedia product could not be loaded. Black aesthetic that matches the style of the kitchen. Power cable fixing elements on the stainless steel cable could be provided (medium cable tie solution) to improve the aesthetics.
Devo dire che vedendo alcune recensioni ero un po’ perplesso, l’ho presa su Amazon perché in caso qualcosa non andava per io verso giusto potevo fare il reso tranquillamente. Sono rimasto molto soddisfatto dell’acquisto.
I have to say that seeing some reviews I was a little perplexed, I bought it on Amazon because in case something didn't go right I could return it without any worries. I was very satisfied with the purchase.
Pas facile à installer. Les vis ne vont pas dans le placo. Il faut penser chevilles à bascule, et si possible pouvoir fixer dans le béton et a minima dans l'ossature métallique du placo au plafond. Sinon, ça peut être comme sur la photo
Not easy to install. The screws do not go into the placo. You have to think about toggle anchors, and if possible be able to fix in the concrete and at least in the metal frame of the placo on the ceiling. Otherwise, it can be like in the photo
Optisch ist die runde Haube ein echter Hingucker. Allerdings ist der Designergimmick mit der umlaufenden Lichtleiste eher lästig, weil es in den Augen blendet. Die Lichtausbeute in Richtung Kochfeld ist eher mäßig, da habe ich von einer LED-Leuchte deutlich mehr erwartet. Gut gelöst ist der Wechsel der Aktivkohlefilter mit der klappbaren Klappe unten, in der die Leuchte integriert ist. Die Aufhängung ist etwas pfriemelig, es empfiehlt sich definitiv sich erst einen Überblick zu verschaffen, bevor man loslegt. Die Spannseile lassen sich nur in Richtung kürzer verstellen, da sollte man sehr vorsichtig agieren. Der Geräuschpegel ist gewaltig, schon auf Stufe eins ist eine Unterhaltung nebenher in Zimmerlautstärke nicht mehr möglich, auf Stufe drei empfehle ich Ohrstöpsel. Ich habe die Haube trotzdem behalten, weil ich zusätzlich einen Rohrlüfter in der Aussenwand installiert habe, der die Hauptarbeit erledigt.
The round hood is a real eye-catcher. However, the designer gimmick with the all-round light bar is rather annoying because it dazzles the eyes. The light output in the direction of the hob is rather moderate, so I expected a lot more from an LED light. Changing the activated charcoal filter is easy with the hinged flap at the bottom, in which the light is integrated. The suspension is a bit fiddly, it is definitely advisable to get an overview before you start. The tension ropes can only be adjusted in a shorter direction, so you should be very careful. The noise level is enormous, even at level one it is no longer possible to have a conversation at room volume, at level three I recommend earplugs. I kept the hood anyway, because I also installed a duct fan in the outer wall, which does the main work.
Molto potente di aspirazione ed è bella come estetica
Very powerful suction and nice looking
Der Kauf ist zu empfehlen. Das Produkt besticht durch sein Design. Die Funktion ist überzeugend, lediglich bei der Montage ist es wohl nur erfahrenen Werklern zu empfehlen. Auch das mittige Kabel ist innerhalb der Fotos nicht erkennbar.
The purchase is recommended. The product impresses with its design. The function is convincing, but when it comes to assembly it is probably only recommended for experienced DIYers. The central cable is also not visible in the photos.
Das Produkt besticht durch sein Design. Die Funktion ist überzeugend, lediglich bei der Montage ist es wohl nur erfahrenen Werklern zu empfehlen. Auch das mittige Kabel ist innerhalb der Fotos nicht erkennbar.
The product impresses with its design. The function is convincing, only during assembly it is probably only recommended for experienced handymen. The central cable is also not visible within the photos.
Sono molto soddisfatta del mio acquisto perfetto sia il design che la funzionalità! Unica pecca se proprio devo essere pignola il rumore che emette quando si metto in funzione le due ventole, ma per essere una cappa a filtri funziona bene. L’ho acquistata per la mansarda a tetto spiovente, per posizionarla in modo corretto ho dovuto solamente regolare le cordine. La consiglio..
I am very satisfied with my purchase, both the design and the functionality are perfect! The only flaw, if I really have to be picky, is the noise it makes when the two fans are turned on, but for a filter hood it works well. I bought it for the attic with a sloping roof, to position it correctly I only had to adjust the cords. I recommend it..
Hotte installée dans ma nouvelle cuisine. Un design splendide. Fonctionne parfaitement bien. Peut-être un petit peu bruyante mais ça va.
Hood installed in my new kitchen. A splendid design. Works perfectly well. Maybe a little noisy but it's ok.
Bruyant
Noisy
Sieht gut aus und erfüllt ihren Zweck. Kann man bedenkenlos weiter empfehlen. Mir gefällt sie sehr gut.
Looks good and serves its purpose. Can be recommended without hesitation. I like it very well.
Dunstabzugshaube. Sieht gut aus und erfüllt ihren Zweck. Kann man bedenkenlos weiter empfehlen. Mir gefällt sie sehr gut.
Extractor hood. Looks good and serves its purpose. Can be recommended without hesitation. I like it very much.
Deckenabzugshaube Die Abzugshaube ist stylisch, dabei funktionell sehr gut: Abzugsvolumen groß, dabei vertretbare Lautstärke. Das Gewicht ist erfreulich gering gegenüber anderen Deckenhauben und die Optik dabei top
Ceiling extractor hood The extractor hood is stylish and very functional: large extraction volume, but reasonable noise level. The weight is pleasingly low compared to other ceiling hoods and the appearance is top
Die Abzugshaube ist stylisch, dabei funktionell sehr gut: Abzugsvolumen groß, dabei vertretbare Lautstärke. Das Gewicht ist erfreulich gering gegenüber anderen Deckenhauben und die Optik dabei top
The extractor hood is stylish, yet functionally very good: large extractor volume, at the same time reasonable volume. The weight is pleasingly low compared to other ceiling hoods and the optics are top
Das Produkt ist grundsätzlich gut verarbeitet! Das Preis-/Leistungsverhältnis bekommt 3von5 Sternen, da ich im Nachhinein festgestellt habe, dass der Artikel über Klarstein (Onlineshop) für über 100€ günstiger angeboten wird! Daher kann ich den Kauf über Amazon nicht empfehlen. Die Kommunikation und telefonische Erreichbarkeit eine einzige Katastrophe! Bei uns war ein Gewinde der Halteseile nicht korrekt gefertigt & ein Teil der Ware schon in der Deckenkonstruktion verbaut! Sodass eine Rücksendung des vollständigen Artikel nicht möglich war! Ein Ersatzteil war nicht lieferbar und damit hat sich der Support zufrieden gegeben. Wir als Kunden haben nun eine Abzugshaube die nicht korrekt aufgehängt werden kann. Schon sehr enttäuschend, wenn man so abgefertigt wird.
The product is generally well made! The price/performance ratio gets 3 out of 5 stars, because afterwards I found out that the article was offered cheaper by Klarstein (online shop) for over €100! So I don't recommend buying it from Amazon. The communication and accessibility by phone was a disaster! With us, a thread of the retaining ropes was not manufactured correctly & part of the goods was already installed in the ceiling construction! So that a return of the complete article was not possible! A spare part was not available and the support was satisfied with that. We as customers now have a hood that cannot be hung up correctly. It's very disappointing when you're treated like that.
Gut Etwas laut sonst super , leite Installation
Good A bit loud otherwise great, lead installation
Etwas laut sonst super , leite Installation
A bit noisy otherwise great, lead installation
OK Schaut gut aus, Absaugleistung auch gut. Das Licht ist eher schwach...
OK Looks good, suction power is also good. The light is rather weak...
Sieht gut aus und passt. Preislich gut.
Looks good and fits. Good price.
Preis ist super Sieht super und stylisch aus, war auch leicht zu montieren nur das schwarze Kabel ist nicht sehr schön und ist auf keinem Foto zu sehen. Sonst bin ich sehr zufrieden.
Price is great. Looks great and stylish, was easy to install, but the black cable isn't very nice and can't be seen in any photo. Otherwise I'm very satisfied.
Sieht super und stylisch aus, war auch leicht zu montieren nur das schwarze Kabel ist nicht sehr schön und ist auf keinem Foto zu sehen. Sonst bin ich sehr zufrieden.
Looks great and stylish, was also easy to assemble only the black cable is not very nice and can not be seen in any photo. Otherwise I am very satisfied.
Prodotto ottimo e bellissimo, top seller! Abbiamo avuto un problema e ci ha rimborsato l'intera cifra, poi abbiamo riordinato il prodotto
Great and beautiful product, top seller! We had a problem and he refunded us the full amount, then we reordered the product
la cappa è davvero molto bella esteticamente, elegante, un vero pezzo d'arredamento. rapporto qualità prezzo ottimo. L'unico neo è la luce che non è potente come mi aspettavo
the hood is really very beautiful aesthetically, elegant, a real piece of furniture. excellent value for money. The only flaw is the light that is not as powerful as I expected
Je recommande
I recommend
Produits bien
Good products
La forme moderne et son originalité ont fait notre choix. Nous avions une hotte d'îlot très belle et très moderne, mais qui n'était plus réparable. Celle-ci est très belle. La seule chose qui gâche un peu le design de cette hotte en forme de large tube de 35 mm de diamètre en aluminium brossé, c'est le fil d'alimentation qui pend du plafond, mais qui est indispensable. Sinon, montage très facile (à deux à la fin) dans le plafond en placoplâtre, mais vu le poids de l'engin, j'ai préféré fixer des tasseaux au dessus du placo sur les fermettes pour assurer la solidité du support. Résultat, une hotte très originale, 3 vitesses d'aspiration peu bruyantes, et 1 mode d'éclairage central très doux avec lumière chaude. Enfin, reçue très largement bien protégée et bien emballée, livrée devant la porte dans le délai prévu, et une satisfaction de l'ensemble des membres du foyer une fois montée et testée.
The modern shape and its originality made our choice. We had a very beautiful and very modern island hood, but which was no longer repairable. This one is very beautiful. The only thing that spoils the design of this hood in the shape of a large 35 mm diameter tube in brushed aluminum is the power cord that hangs from the ceiling, but which is essential. Otherwise, very easy assembly (two people at the end) in the Placoplâtre ceiling, but given the weight of the machine, I preferred to fix cleats above the placo on the trusses to ensure the solidity of the support. Result, a very original hood, 3 quiet suction speeds, and 1 very soft central lighting mode with warm light. Finally, received very well protected and well packaged, delivered to the door within the expected time, and satisfaction of all the members of the household once assembled and tested.
Genau was ich gesucht habe! Super Abzugshaube in schönem Design. Gute Verarbeitung und Funktion!
Exactly what I was looking for! Great extractor hood with a beautiful design. Good workmanship and function!
Esthétique sympa, montage pas trop compliqué, je l'ai monté seul. Chevilles fournis trop grosse et trop longue, j'ai opté pour des chevilles charge lourde en diamètre 6, 37mm de longueur capable de tenir en charge 60kg par cheville dans le béton, donc la on est large. Perfo obligatoire sinon mon cul. Bon les -, bruyante même calée sur la plus petite vitesse, alors je vous dit pas les autres, éclairage moyen, moyen, pour le coup vu la surface de l'éclairage je m'attendais à mieux, a voir si je peux améliorer ça.
Nice aesthetics, not too complicated assembly, I assembled it alone. Anchors provided too big and too long, I opted for heavy-duty anchors in diameter 6, 37mm long capable of holding 60kg per anchor in concrete, so we are wide. Mandatory drilling otherwise my ass. Well the -, noisy even set on the lowest speed, so I won't tell you the others, average lighting, average, for the time being given the surface of the lighting I expected better, to see if I can improve that.
Seit sieben Jahren rödelte in meiner Küche eine sehr klobige Inselesse. Die Klarstein Lösung fand ich optisch immer recht ansprechend, konnte mich aber nicht so recht durchringen. Nun war es soweit. Vorweg: ich bin recht zufrieden damit. Die Haube sieht stylisch aus, öffnet den Raum durch die schlanke Optik mit den Drahtseilen und zieht trotz des kleinen Motors erstaunlich kräftig ab. Von der Seite gibt es daher wenig zu bemängeln, so dass ich die alte Inselesse nun wirklich abgebe und die Decke endgültig neu streiche. :) Man merkt der Klarstein Tron Ambience dann aber auch den erstaunlich günstigen Preis an einigen Stellen an. Manche sind unverständlich, manche sicherlich einfach nur mit mehr Geldeinsatz möglich: - Die Beleuchtung ist ziemlich schwach. Der nach unten leuchtende LED Ring hat nur 2,5W, und das ist einfach sehr wenig. Schade, wenn man vorher viel Licht gewohnt war. - Die Haube hat von innen eine Schweissnaht, praktisch auf der Gegenseite des Bedienelements. Das ist daher die Sichtseite vom Wohnraum aus. Genau da ist das Edelstahl aber nicht 100% plan, es wirkt ein wenig wie leicht verbeult, ist aber einfach der nicht perfekten Endmontage geschuldet. Fällt kaum auf, mir aber eben schon, ich kann aber damit leben. - Es gibt von oben keine Abdeckung, man schaut offen auf die Mechanik (siehe Bild). Was das auf Dauer für die Verstaubung bedeutet, wird sich noch zeigen. Die Reinigung macht es jedenfalls nicht einfacher. - Der Motor war nicht sauber montiert und eierte. Ist zum Glück vor der Installation aufgefallen und wurde von mir behoben. - Die Abdeckplatte für die Decke ist nur 4cm hoch. Das ist schön schlank, aber viel zu flach, wenn man das Kabel dahinter an einem Schukostecker oder einer Aufputzdose verstecken möchte. Ich musste ziemlich tricksen. - Passt zum vorherigen Punkt: Die Kabeldurchführung ist seitlich in der Abdeckplatte nach außen vorgesehen und entsprechend großzügig ausgefräst. Hätte man viel kleiner lösen können und verdirbt etwas die Optik. - Das schwarze Kabel hängt etwas uninspiriert und wellig herum. Ein flexibleres Silikonkabel hätte es schicker gemacht, optimalerweise in weiss - ich werde wohl das Kabel selbst tauschen, damit es nicht mehr so auffällt. - Die Anleitung ist wirklich ein Witz. Auf der Packung ist ein QR Code für eine PDF Anleitung im Netz. Der Link auf der Webpage dazu funktioniert aber leider nicht, es ist keine PDF hinterlegt. Die mitgelieferten Dübel und Schrauben sind gar nicht mal schlecht. Ich habe alle acht in eine Betondecke gejagt, das hält definitiv. Ein paar Tipps zur Montage: - Vorher über die Kabeldurchführung Gedanken machen! Am besten zur Seite mit geringstmöglichem Blick drehen - Aufbauhöhe des bauseitigen Stromanschlusses beachten, damit er unter die Abdeckplatte passt - Halteplatte im ausgebauten Zustand vormontieren und auf maximale Länge einstellen. Nehmt Handschuhe, die Enden der Drähte pieksen ordentlich. - Nutzt den Versandkarton als Basis, um die Haube darauf auf dem Kochfeld abzustellen. So kann man die Deckenplatte spannungsfrei montieren. Dann die Drähte auf Spannung bringen (einfach hochschieben) und den Karton entfernen. Nun (zu zweit) auf Höhe heben, Spannung auf die Seile geben, und per Wasserwaage ausnivellieren - Die Seile können auch eingebaut problemlos wieder länger gezogen werden: Dazu die Seile entspannen, den kleinen Bolzen am "Ausgang" hochdrücken, und das Seil herunterziehen. Steht leider in keiner Anleitung, ist aber denkbar einfach und hilfreich. Wenn die Haube erstmal hängt, sieht sie total klasse aus. Das Licht ist seitdem als Ambientebeleuchtung immer an - der Leuchtring ist ziemlich schick. Ich behalte sie vor allem, weil sie optisch konkurrenzlos ist, noch dazu zu dem Preis. Übrigens, auf den Bildern täuscht die Lichtfarbe etwas, es ist ein leicht gelbliches weiss. Mit etwas Vorbehalt hinsichtlich Feinqualität, Montage und Lichtstärke kann ich die Haube schon empfehlen, aber man sollte kein perfektes Stück Technik erwarten.
A very bulky island hood has been idling in my kitchen for seven years. I always found the Klarstein solution visually appealing, but I couldn't really get my head around it. Now it was time. First of all: I'm quite happy with it. The hood looks stylish, opens up the space with the slim look with the wire ropes and, despite the small motor, pulls off surprisingly well. From the side there is therefore little to complain about, so that I really give up the old island hood and finally repaint the ceiling. :) But then you also notice the surprisingly low price of the Klarstein Tron Ambience in some places. Some are incomprehensible, some are certainly only possible with more money: - The lighting is quite weak. The LED ring, which shines downwards, has only 2.5W, and that is simply very little. It's a shame if you were used to lots of light before. - The hood has a weld seam on the inside, practically on the opposite side of the control element. This is therefore the visible side from the living room. This is exactly where the stainless steel is not 100% flat, it looks a little dented, but it is simply due to the imperfect final assembly. Hardly noticeable, but I do, but I can live with it. - There is no cover from above, you can see the mechanics openly (see picture). It remains to be seen what that means in the long run for dust accumulation. It doesn't make cleaning any easier. - The motor was not installed properly and wobbled. Luckily it was noticed before the installation and I fixed it. - The cover plate for the ceiling is only 4cm high. It's nice and slim, but far too flat if you want to hide the cable behind it on a Schuko plug or a surface-mounted socket. I had to trick quite a bit. - Matches the previous point: The cable duct is provided on the side of the cover plate on the outside and is correspondingly generously milled out. You could have solved much smaller and spoils the optics. - The black cable hangs around a bit uninspired and wavy. A more flexible silicone cable would have made it look smarter, ideally in white - I'll probably swap the cable myself so that it's less noticeable. - The instructions are really a joke. On the package is a QR code for a PDF manual on the web. Unfortunately, the link on the website does not work, there is no PDF file. The dowels and screws that come with it aren't bad at all. I chased all eight into a concrete pavement, it will definitely hold up. A few tips for installation: - Think about the cable bushing beforehand! It is best to turn to the side with the least possible view - note the installation height of the on-site power connection so that it fits under the cover plate - pre-assemble the retaining plate when dismantled and adjust to the maximum length. Use gloves, the ends of the wires poke badly. - Use the shipping carton as a base to place the hood on top of the hob. In this way, the ceiling panel can be installed stress-free. Then tension the wires (simply push them up) and remove the box. Now (in pairs) raise to height, apply tension to the ropes, and level using a spirit level - the ropes can also be lengthened without any problems: To do this, relax the ropes, push up the small bolt at the "exit" and pull the rope down. Unfortunately, it is not in any instructions, but it is very simple and helpful. Once the hood is up, it looks absolutely gorgeous. Since then, the light has always been on as ambient lighting - the light ring is quite chic. I'm keeping it mainly because it's unrivaled in looks, and at the price. By the way, the light color in the pictures is a bit deceptive, it is a slightly yellowish white. With some reservations regarding fine quality, assembly and light intensity, I can recommend the hood, but you should not expect a perfect piece of technology.
Nicht perfekt, aber für den Preis sehr angemessen Seit sieben Jahren rödelte in meiner Küche eine sehr klobige Inselesse. Die Klarstein Lösung fand ich optisch immer recht ansprechend, konnte mich aber nicht so recht durchringen. Nun war es soweit. Vorweg: ich bin recht zufrieden damit. Die Haube sieht stylisch aus, öffnet den Raum durch die schlanke Optik mit den Drahtseilen und zieht trotz des kleinen Motors erstaunlich kräftig ab. Von der Seite gibt es daher wenig zu bemängeln, so dass ich die alte Inselesse nun wirklich abgebe und die Decke endgültig neu streiche. :) Man merkt der Klarstein Tron Ambience dann aber auch den erstaunlich günstigen Preis an einigen Stellen an. Manche sind unverständlich, manche sicherlich einfach nur mit mehr Geldeinsatz möglich: - Die Beleuchtung ist ziemlich schwach. Der nach unten leuchtende LED Ring hat nur 2,5W, und das ist einfach sehr wenig. Schade, wenn man vorher viel Licht gewohnt war. - Die Haube hat von innen eine Schweissnaht, praktisch auf der Gegenseite des Bedienelements. Das ist daher die Sichtseite vom Wohnraum aus. Genau da ist das Edelstahl aber nicht 100% plan, es wirkt ein wenig wie leicht verbeult, ist aber einfach der nicht perfekten Endmontage geschuldet. Fällt kaum auf, mir aber eben schon, ich kann aber damit leben. - Es gibt von oben keine Abdeckung, man schaut offen auf die Mechanik (siehe Bild). Was das auf Dauer für die Verstaubung bedeutet, wird sich noch zeigen. Die Reinigung macht es jedenfalls nicht einfacher. - Der Motor war nicht sauber montiert und eierte. Ist zum Glück vor der Installation aufgefallen und wurde von mir behoben. - Die Abdeckplatte für die Decke ist nur 4cm hoch. Das ist schön schlank, aber viel zu flach, wenn man das Kabel dahinter an einem Schukostecker oder einer Aufputzdose verstecken möchte. Ich musste ziemlich tricksen. - Passt zum vorherigen Punkt: Die Kabeldurchführung ist seitlich in der Abdeckplatte nach außen vorgesehen und entsprechend großzügig ausgefräst. Hätte man viel kleiner lösen können und verdirbt etwas die Optik. - Das schwarze Kabel hängt etwas uninspiriert und wellig herum. Ein flexibleres Silikonkabel hätte es schicker gemacht, optimalerweise in weiss - ich werde wohl das Kabel selbst tauschen, damit es nicht mehr so auffällt. - Die Anleitung ist wirklich ein Witz. Auf der Packung ist ein QR Code für eine PDF Anleitung im Netz. Der Link auf der Webpage dazu funktioniert aber leider nicht, es ist keine PDF hinterlegt. Die mitgelieferten Dübel und Schrauben sind gar nicht mal schlecht. Ich habe alle acht in eine Betondecke gejagt, das hält definitiv. Ein paar Tipps zur Montage: - Vorher über die Kabeldurchführung Gedanken machen! Am besten zur Seite mit geringstmöglichem Blick drehen - Aufbauhöhe des bauseitigen Stromanschlusses beachten, damit er unter die Abdeckplatte passt - Halteplatte im ausgebauten Zustand vormontieren und auf maximale Länge einstellen. Nehmt Handschuhe, die Enden der Drähte pieksen ordentlich. - Nutzt den Versandkarton als Basis, um die Haube darauf auf dem Kochfeld abzustellen. So kann man die Deckenplatte spannungsfrei montieren. Dann die Drähte auf Spannung bringen (einfach hochschieben) und den Karton entfernen. Nun (zu zweit) auf Höhe heben, Spannung auf die Seile geben, und per Wasserwaage ausnivellieren - Die Seile können auch eingebaut problemlos wieder länger gezogen werden: Dazu die Seile entspannen, den kleinen Bolzen am "Ausgang" hochdrücken, und das Seil herunterziehen. Steht leider in keiner Anleitung, ist aber denkbar einfach und hilfreich. Wenn die Haube erstmal hängt, sieht sie total klasse aus. Das Licht ist seitdem als Ambientebeleuchtung immer an - der Leuchtring ist ziemlich schick. Ich behalte sie vor allem, weil sie optisch konkurrenzlos ist, noch dazu zu dem Preis. Übrigens, auf den Bildern täuscht die Lichtfarbe etwas, es ist ein leicht gelbliches weiss. Mit etwas Vorbehalt hinsichtlich Feinqualität, Montage und Lichtstärke kann ich die Haube schon empfehlen, aber man sollte kein perfektes Stück Technik erwarten.
Not perfect, but very reasonable for the price For seven years, a very bulky island hood was rumbling around in my kitchen. I always found the Klarstein solution visually quite appealing, but couldn't quite bring myself to buy it. Now the time has come. First of all: I'm quite happy with it. The hood looks stylish, opens up the room with its slim look and wire cables, and despite the small motor, it pulls surprisingly powerfully. There is therefore little to complain about from the side, so I'm really going to give up the old island hood and finally repaint the ceiling. :) But you can also tell that the Klarstein Tron Ambience is surprisingly cheap in some places. Some are incomprehensible, some are probably only possible with more money: - The lighting is quite weak. The LED ring that shines downwards only has 2.5W, and that's just very little. A shame if you were used to a lot of light before. - The hood has a weld seam on the inside, practically on the opposite side of the control element. This is therefore the visible side from the living room. But that's exactly where the stainless steel isn't 100% flat, it looks a little dented, but that's just because the final assembly wasn't perfect. It's hardly noticeable, but I do notice it, but I can live with it. - There's no cover from above, you can see the mechanics (see picture). What this means for dust in the long run remains to be seen. Cleaning certainly doesn't make it any easier. - The motor wasn't installed properly and wobbled. Luckily I noticed it before installation and fixed it. - The cover plate for the ceiling is only 4cm high. That's nice and slim, but much too flat if you want to hide the cable behind it on a Schuko plug or a surface-mounted box. I had to use a lot of tricks. - This fits with the previous point: the cable feedthrough is provided on the side of the cover plate facing outwards and is milled out accordingly. It could have been made much smaller and it spoils the look a bit. - The black cable hangs around a bit uninspired and wavy. A more flexible silicone cable would have made it look nicer, ideally in white - I'll probably replace the cable myself so it's not so noticeable. - The instructions are really a joke. There's a QR code on the packaging for a PDF manual on the internet. Unfortunately, the link on the website doesn't work, there's no PDF. The dowels and screws supplied aren't bad at all. I drove all eight into a concrete ceiling, and it definitely holds. A few tips for installation: - Think about the cable feedthrough beforehand! It's best to turn it to the side so you can see as little as possible - Pay attention to the installation height of the on-site power connection so that it fits under the cover plate - Pre-assemble the holding plate when it's removed and adjust it to the maximum length. Wear gloves, the ends of the wires are really poking. - Use the shipping box as a base to place the hood on the hob. This way you can install the ceiling plate without any tension. Then apply tension to the wires (just push them up) and remove the box. Now lift it to a height (with two people), put tension on the cables and level it using a spirit level - the cables can easily be made longer again even after installation: To do this, relax the cables, push up the small bolt at the "output" and pull the cable down. Unfortunately, this is not mentioned in any instructions, but it is extremely simple and helpful. Once the hood is hanging, it looks absolutely great. The light has been on as ambient lighting ever since - the light ring is pretty neat. I'm keeping it mainly because it is visually unrivaled, especially at that price. By the way, the light color is a bit misleading in the pictures - it is a slightly yellowish white. With some reservations about the fine quality, assembly and light intensity, I can recommend the hood, but you shouldn't expect a perfect piece of technology.
Très bon produit facile à installer je recommande il fonctionne très bien à part une petite bosse à la livraison
Very good product, easy to install, I recommend it, it works very well apart from a small dent on delivery
On a pris 3H à la poser à 2, mais on n'est pas expert. Elle est très jolie et fonctionnelle.
It took us 3 hours to install it, but we are not experts. It is very pretty and functional.
Rundet eine Küche mit Kochinsel ab. Wertig und sieht edel aus Schickes Teil! Der Aufbau war kompliziert und sollte von min 2 Personen durchgeführt werden. #Hinweis: Die Länge der Drähte sollte erst zum Schluss eingestellt werden. Erst auf Höhe bringen dann auf Waage.
Completes a kitchen with a cooking island. High quality and looks classy. A stylish piece! The assembly was complicated and should be carried out by at least 2 people. #Note: The length of the wires should only be adjusted at the end. First adjust to the height, then to the scale.
Parfait très beau rendu et fonctionne super bien
Perfect, very nice rendering and works super well
zurückgeschickt weil das sichtbare Stromkabel dick und schwarz ist Leider ging die sonst sehr hübsche Abzugshaube auf direkten Weg zurück, da ein dickes schwarzes Stromkabel von der Decke zwischen den Seilen hänge würde. Das finde ich nicht akzeptabel vom Design. Bei der günstigen Variante (die ich jetzt auch habe) ist es hell (Silber) und das sieht einfach viel besser aus. Mehr kann ich dazu nicht sagen, da sie nicht montiert wurde. ..
returned because the visible power cable is thick and black Unfortunately, the otherwise very pretty extractor hood had to be returned straight away because a thick black power cable was hanging from the ceiling between the ropes. I don't think that's an acceptable design. The cheaper version (which I now have) is light (silver) and that just looks much better. I can't say more about it because it wasn't installed. ..
Leider ging die sonst sehr hübsche Abzugshaube auf direkten Weg zurück, da ein dickes schwarzes Stromkabel von der Decke zwischen den Seilen hänge würde. Das finde ich nicht akzeptabel vom Design. Bei der günstigen Variante (die ich jetzt auch habe) ist es hell (Silber) und das sieht einfach viel besser aus. Mehr kann ich dazu nicht sagen, da sie nicht montiert wurde. ..
Unfortunately, the otherwise very pretty extractor hood went directly back, as a thick black power cable would hang from the ceiling between the ropes. I don't find that acceptable in terms of design. The cheap version (which I also have now) is light (silver) and it just looks a lot better. I can't say more because it wasn't installed. ..
Hotte bien reçu , intacte dans son emballage, avec les filtres charbons. Un peu bruyante ... normal pour une hotte on va dire. Esthétique nickel notamment avec le bandeau lumineux que je trouve vraiment sympa. Il gaudrais faire apparaitre le cable d'alimentation sur les photos car il est voyant dans la réalité.
Hood well received, intact in its packaging, with carbon filters. A little noisy ... normal for a hood let's say. Nickel aesthetics especially with the light strip that I find really nice. It would be good to show the power cable in the photos because it is visible in reality.
Ein Schmuckstück! Wunderbare Abzugshaube, die endlich mal anders aussieht! Montage einfach, Bedienung ebenfalls! Wir sind sehr mit unserer Wahl zufrieden. In höchster Stufe etwas laut, aber das stört uns nicht, da die niedrigeren Stufen ausreichend sind. Das Licht ist klasse, nicht zu grell aber schön hell. Würden wir wieder kaufen.
A gem! Wonderful extractor hood that finally looks different! Easy to assemble, easy to use too! We are very happy with our choice. A bit loud at the highest setting, but that doesn't bother us as the lower settings are sufficient. The light is great, not too bright but nice and bright. We would buy it again.
Wunderbare Abzugshaube, die endlich mal anders aussieht! Montage einfach, Bedienung ebenfalls! Wir sind sehr mit unserer Wahl zufrieden. In höchster Stufe etwas laut, aber das stört uns nicht, da die niedrigeren Stufen ausreichend sind. Das Licht ist klasse, nicht zu grell aber schön hell. Würden wir wieder kaufen.
Wonderful extractor hood that finally looks different! Easy to assemble, easy to use! We are very happy with our choice. A bit noisy at the highest level, but that doesn't bother us as the lower levels are sufficient. The light is great, not too bright but nice and bright. We would buy again.
Die Optik ist gut und ansprechend. Da es verschiedene Ausführungen gib, achten Sie darauf 1. das nicht der Lampen- ring sonder 2 Strahle angebracht sind. 2. durch den Lampen-ring wird der Ansaugquerschnitt verringert. 3. der Querschnitt vom Ring ist ziemlich genau die Hälfte vom Querschnitt der Ansaugöffnung darunter 4. Sollten Sie versuchen das Gerät an einen Herd der an der Wand steht zu platzieren nicht ratsam. Die Abluft wird an die Decke geblasen und an dem Wänden runtergedrückt, dadurch entsteht zwischen Kochplatte und Abzugs-Fläche ein Horizontaler Luftstrom. Der geringe Querschnitt des Ansaug- rings schaft es dann nicht die Luft nach oben zu ziehen. Fazit die Luft wird nicht gereinigt. 5. Dieses Gerät ist aus den oben genanten Gründen nur geeignet für einen Herd mit Abzugsmöglichkeiten über die Außenwand oder wie in der Anleitung beschrieben über ein Insel-Koch-Feld. 6. die Kohlefilter sind viel zu teuer, es gibt viel günstigere aber die Fa. Klarstein hat leider eine Spezial-Größe die bis zu vier mal so teuer ist als die universellen. 7. die Aufbauanleitung ist gewöhnungsbedürftig und für Menschen mit zwei linken Händen völlig ungeeignet. 8. Das Gerät funktioniert, das Handicap ist der viel zu geringer Querschnitt des Ansaug-rings.
The optics are good and attractive. Since there are different designs, please make sure 1. that not the lamp ring but 2 beams are attached. 2. The intake cross-section is reduced by the lamp ring. 3. The cross-section of the ring is almost exactly half the cross-section of the suction opening below it. 4. Not advisable if you try to place the appliance on a wall-mounted stove. The exhaust air is blown to the ceiling and pressed down the walls, creating a horizontal air flow between the hotplate and the extraction surface. The small cross-section of the intake ring is then unable to pull the air upwards. Conclusion the air is not cleaned. 5. For the reasons mentioned above, this appliance is only suitable for a cooker with extraction options via the outer wall or, as described in the instructions, via an island hob. 6. The charcoal filters are far too expensive, there are much cheaper ones, but unfortunately Klarstein has a special size that is up to four times more expensive than the universal ones. 7. the assembly instructions take some getting used to and are completely unsuitable for people with two left hands. 8. The device works, the handicap is the much too small cross-section of the suction ring.
Diese Geräte sind für die Abluft mit Wandanschluss nach außen und über eine Insel-koch-Feld geeignet Die Optik ist gut und ansprechend. Da es verschiedene Ausführungen gib, achten Sie darauf 1. das nicht der Lampen- ring sonder 2 Strahle angebracht sind. 2. durch den Lampen-ring wird der Ansaugquerschnitt verringert. 3. der Querschnitt vom Ring ist ziemlich genau die Hälfte vom Querschnitt der Ansaugöffnung darunter 4. Sollten Sie versuchen das Gerät an einen Herd der an der Wand steht zu platzieren nicht ratsam. Die Abluft wird an die Decke geblasen und an dem Wänden runtergedrückt, dadurch entsteht zwischen Kochplatte und Abzugs-Fläche ein Horizontaler Luftstrom. Der geringe Querschnitt des Ansaug- rings schaft es dann nicht die Luft nach oben zu ziehen. Fazit die Luft wird nicht gereinigt. 5. Dieses Gerät ist aus den oben genanten Gründen nur geeignet für einen Herd mit Abzugsmöglichkeiten über die Außenwand oder wie in der Anleitung beschrieben über ein Insel-Koch-Feld. 6. die Kohlefilter sind viel zu teuer, es gibt viel günstigere aber die Fa. Klarstein hat leider eine Spezial-Größe die bis zu vier mal so teuer ist als die universellen. 7. die Aufbauanleitung ist gewöhnungsbedürftig und für Menschen mit zwei linken Händen völlig ungeeignet. 8. Das Gerät funktioniert, das Handicap ist der viel zu geringer Querschnitt des Ansaug-rings.
These devices are suitable for exhaust air with a wall connection to the outside and via an island hob. They look good and attractive. As there are different versions, make sure that 1. there are 2 jets attached and not the lamp ring. 2. the lamp ring reduces the intake cross-section. 3. the cross-section of the ring is almost exactly half the cross-section of the intake opening underneath. 4. if you try to place the device on a stove that is against the wall, it is not advisable. The exhaust air is blown onto the ceiling and pressed down the walls, creating a horizontal airflow between the hob and the extractor surface. The small cross-section of the intake ring is then unable to draw the air upwards. In conclusion, the air is not cleaned. 5. for the reasons stated above, this device is only suitable for a stove with extraction options via the outside wall or, as described in the instructions, via an island hob. 6. The carbon filters are far too expensive, there are much cheaper ones but unfortunately Klarstein has a special size that is up to four times as expensive as the universal ones. 7. The assembly instructions take some getting used to and are completely unsuitable for people with two left hands. 8. The device works, the handicap is the much too small cross-section of the intake ring.
Diese Dunstabzugshaube ist chic und für den Preis qualitativ hochwertig. Genau so etwas haben wir gesucht. Geliefertes Gerät war wie beschrieben und abgebildet. Allerdings gibt die Montageanleitung hinsichtlich (der dann doch in beide Richtungen) verschiebbaren Drahtseil-Stopper nichts her, auch nicht wie man justiert. Wenn man den Trick raus hat, ist es wirklich easy. Aber warum beschreibt man es nicht, ist doch ein klasse Trick, der ein weiteres Verkaufsargument wäre. Dies und die mitgelieferten acht 10er Plastikdübel ergaben dann eine Punkt Abzug meinerseits. In Deutschland verlangt der Brandschutz bei diesem Gewicht und über einer Feuerstelle Metalldübel. Mein Handwerker hat sich geweigert hier Kunststoffdübel zu benutzen. Er verwendete dann nur vier 6er Metalldübel die in einer Betondecke bombig halten und vollkommen ausreichen. Hier besteht also bei der Montageanleitung und dem Montagezubehör Verbesserungsbedarf. Eigentlich eine Kleinigkeit, aber erst dann gibt es ohne "Wenn" und "Aber" fünf Sterne!
This cooker hood is stylish and of high quality for the price. That's exactly what we were looking for. The device delivered was as described and pictured. However, the assembly instructions do not give anything with regard to the wire rope stoppers that can be moved in both directions, nor how to adjust them. Once you get the trick down, it's really easy. But why not describe it is a great trick that would be another selling point. This and the eight 10mm plastic dowels supplied resulted in a point deduction on my part. In Germany, fire protection requires metal dowels for this weight and over a fireplace. My craftsman refused to use plastic dowels here. He then used only four size 6 metal dowels, which held up really well in a concrete ceiling and were perfectly adequate. So there is room for improvement here with the assembly instructions and the assembly accessories. Actually a little thing, but only then there are five stars without "ifs" and "buts"!
Super - aber Montageanleitung und -zubehör mangelhaft Diese Dunstabzugshaube ist chic und für den Preis qualitativ hochwertig. Genau so etwas haben wir gesucht. Geliefertes Gerät war wie beschrieben und abgebildet. Allerdings gibt die Montageanleitung hinsichtlich (der dann doch in beide Richtungen) verschiebbaren Drahtseil-Stopper nichts her, auch nicht wie man justiert. Wenn man den Trick raus hat, ist es wirklich easy. Aber warum beschreibt man es nicht, ist doch ein klasse Trick, der ein weiteres Verkaufsargument wäre. Dies und die mitgelieferten acht 10er Plastikdübel ergaben dann eine Punkt Abzug meinerseits. In Deutschland verlangt der Brandschutz bei diesem Gewicht und über einer Feuerstelle Metalldübel. Mein Handwerker hat sich geweigert hier Kunststoffdübel zu benutzen. Er verwendete dann nur vier 6er Metalldübel die in einer Betondecke bombig halten und vollkommen ausreichen. Hier besteht also bei der Montageanleitung und dem Montagezubehör Verbesserungsbedarf. Eigentlich eine Kleinigkeit, aber erst dann gibt es ohne "Wenn" und "Aber" fünf Sterne!
Great - but assembly instructions and accessories are inadequate This extractor hood is chic and of high quality for the price. This is exactly what we were looking for. The delivered device was as described and shown. However, the assembly instructions do not provide any information about the wire rope stoppers (which can be moved in both directions), nor how to adjust them. Once you've got the hang of it, it's really easy. But why not describe it, it's a great trick that would be another selling point. This and the eight size 10 plastic dowels supplied resulted in a point deduction from me. In Germany, fire protection requires metal dowels for this weight and above a fireplace. My tradesman refused to use plastic dowels here. He only used four size 6 metal dowels, which hold perfectly in a concrete ceiling and are completely sufficient. So there is room for improvement in the assembly instructions and the assembly accessories. Actually a small thing, but only then does it get five stars without any "ifs" or "buts"!
Sehr schönes Design guter Abzug Super modernes Gerät Einfacher Aufbau Schönes Design kann ich nur weiterempfehlen Beleuchtung könnte etwas stärker sein Top Ware.
Very nice design, good extractor, super modern device, easy to assemble, nice design, I can only recommend it. Lighting could be a bit stronger, top product.
Tut, was sie soll und sieht klasse dabei aus Die Abzugshaube sieht super aus, funktioniert tadellos und leuchtet die Kochplatte sehr schön aus. Ein Stern Abzug für die magere Bedienungs-/ Aufbauanleitung. Durch probieren bekommt man zwar alles raus, aber wenigstens eine Vernünftige Darstellung, wie man die Filter, vor allem den Aktivkohlefilter wechselt, hätte ich mir gewünscht. Die Bilder sind wenig aussagekräftig.
Does what it's supposed to and looks great doing it. The extractor hood looks great, works perfectly and lights up the hob very nicely. One star deducted for the poor operating/assembly instructions. You can figure everything out by trying, but I would have liked at least a reasonable explanation of how to change the filters, especially the activated carbon filter. The pictures are not very informative.
Die Abzugshaube sieht super aus, funktioniert tadellos und leuchtet die Kochplatte sehr schön aus. Ein Stern Abzug für die magere Bedienungs-/ Aufbauanleitung. Durch probieren bekommt man zwar alles raus, aber wenigstens eine Vernünftige Darstellung, wie man die Filter, vor allem den Aktivkohlefilter wechselt, hätte ich mir gewünscht. Die Bilder sind wenig aussagekräftig.
The extractor hood looks great, works perfectly and illuminates the hotplate very nicely. One star deduction for the meager operating/assembly instructions. You can find out everything by trying, but I would have liked at least a reasonable representation of how to change the filter, especially the activated carbon filter. The pictures are not very meaningful.
Sehr elegante Abzugshaube, super geeignet für freistehende Kochstellen, Montage ging gut, Anwendung ist einfach und erklärt sich von selbst, Licht könnte etwas heller sein um die Kochfläche besser auszuleuchten. Ansonsten ein echter Hingucker und optisches Highlight, wenn man das mit den üblichen, hässlichen, plumpen Abzugshauben vergleicht, die es sonst so zu kaufen gibt.
Very elegant extractor hood, super suitable for free-standing hobs, assembly went well, application is easy and self-explanatory, light could be a little brighter to better illuminate the hob. Otherwise a real eye-catcher and optical highlight if you compare it with the usual, ugly, clumsy extractor hoods that are otherwise available for purchase.
Optisches Highlight Sehr elegante Abzugshaube, super geeignet für freistehende Kochstellen, Montage ging gut, Anwendung ist einfach und erklärt sich von selbst, Licht könnte etwas heller sein um die Kochfläche besser auszuleuchten. Ansonsten ein echter Hingucker und optisches Highlight, wenn man das mit den üblichen, hässlichen, plumpen Abzugshauben vergleicht, die es sonst so zu kaufen gibt.
Visual highlight Very elegant extractor hood, superbly suited for free-standing cookers, assembly went well, use is simple and self-explanatory, light could be a bit brighter to better illuminate the cooking surface. Otherwise a real eye-catcher and visual highlight when you compare it to the usual, ugly, clumsy extractor hoods that are otherwise available to buy.